The journey to the swagger page with Docker, Azure Functions and .NET 7.0
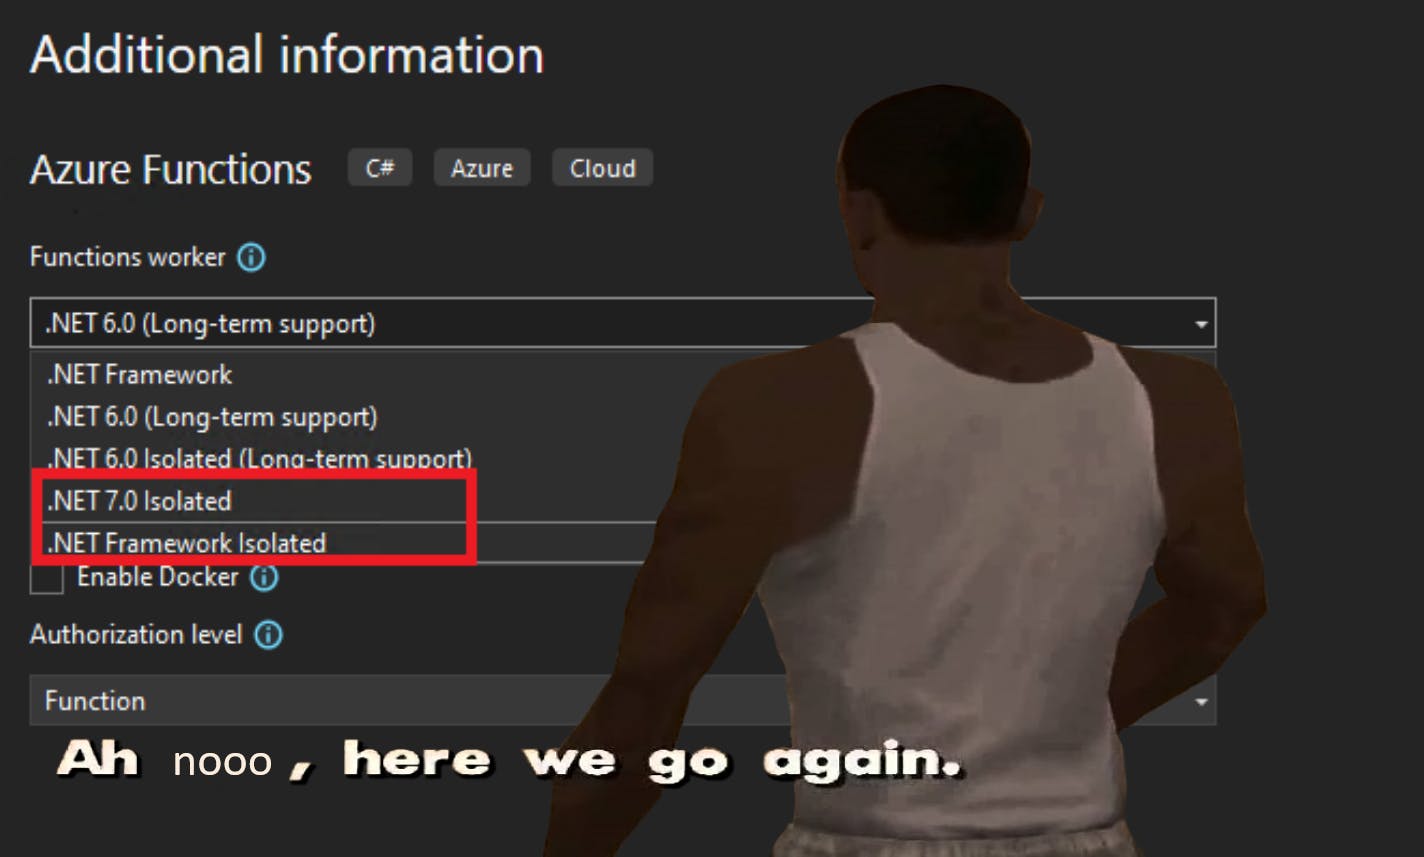
.NET 7.0 is only supported in Azure Functions as an isolated process.

Why is this so terrible anyway (it's not)?
Well, from the number of functions I've created over the years, the moment you have to fall into the isolated runtime with functions, most documentation fails to explain how to move forward. This article is aimed in providing a reference point for those facing similar issues when trying to use Azure Functions with .NET 7.0 or in dotnet-isolated runtimes in general.
What are dotnet-isolated runtimes in Azure Functions?
When running Azure Functions in the dotnet-isolated runtime, the functions run in an isolated worker process in Azure. This allows you to run your .NET class library functions on a version of .NET that is different from the version used by the Function host process. Check out this article from Microsoft which guides you into running C# Azure Functions in an isolated worker.
Why are dotnet-isolated runtimes useful?
Keeping in line with the topic of this post, the dotnet-isolated runtime allows us to run .NET 7.0 without needing to wait for Microsoft to support this version (if they do!). In past experiences this has also come in useful where are NuGet package has dependencies with a different version of a library that is installed in the in-process model. Specifically this a problem in the Microsoft.Graph NuGet package for those interested.
Running the dotnet-isolated Azure Function in Docker
Summary
In this example, we will create a Linux hosted dotnet-isolated Azure Function in Docker. Once we've got it running we will look at getting the swagger page up and running.
Pre-requisites
- Docker Desktop
- Visual Studio (with Azure Development installed)
- SSMS (Optional)
Create the solution and Azure Function
- Create the solution in the directory of choice, make sure to choose the Azure Function project
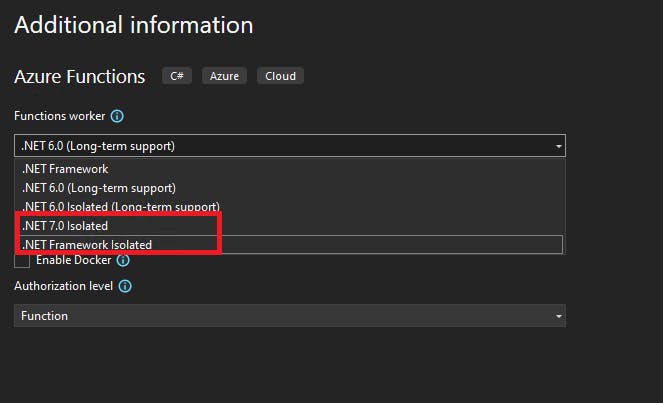
- Create the project with the settings below, making sure Docker is enabled and the appropriate runtime is selected.
- Functions worker: .NET 7.0 Isolated
- Function: HttpTrigger
- Use Azurite for runtime storage account (AzureWebJobsStorage): Enabled
- Enable Docker: Enabled
- Authorization level: Function
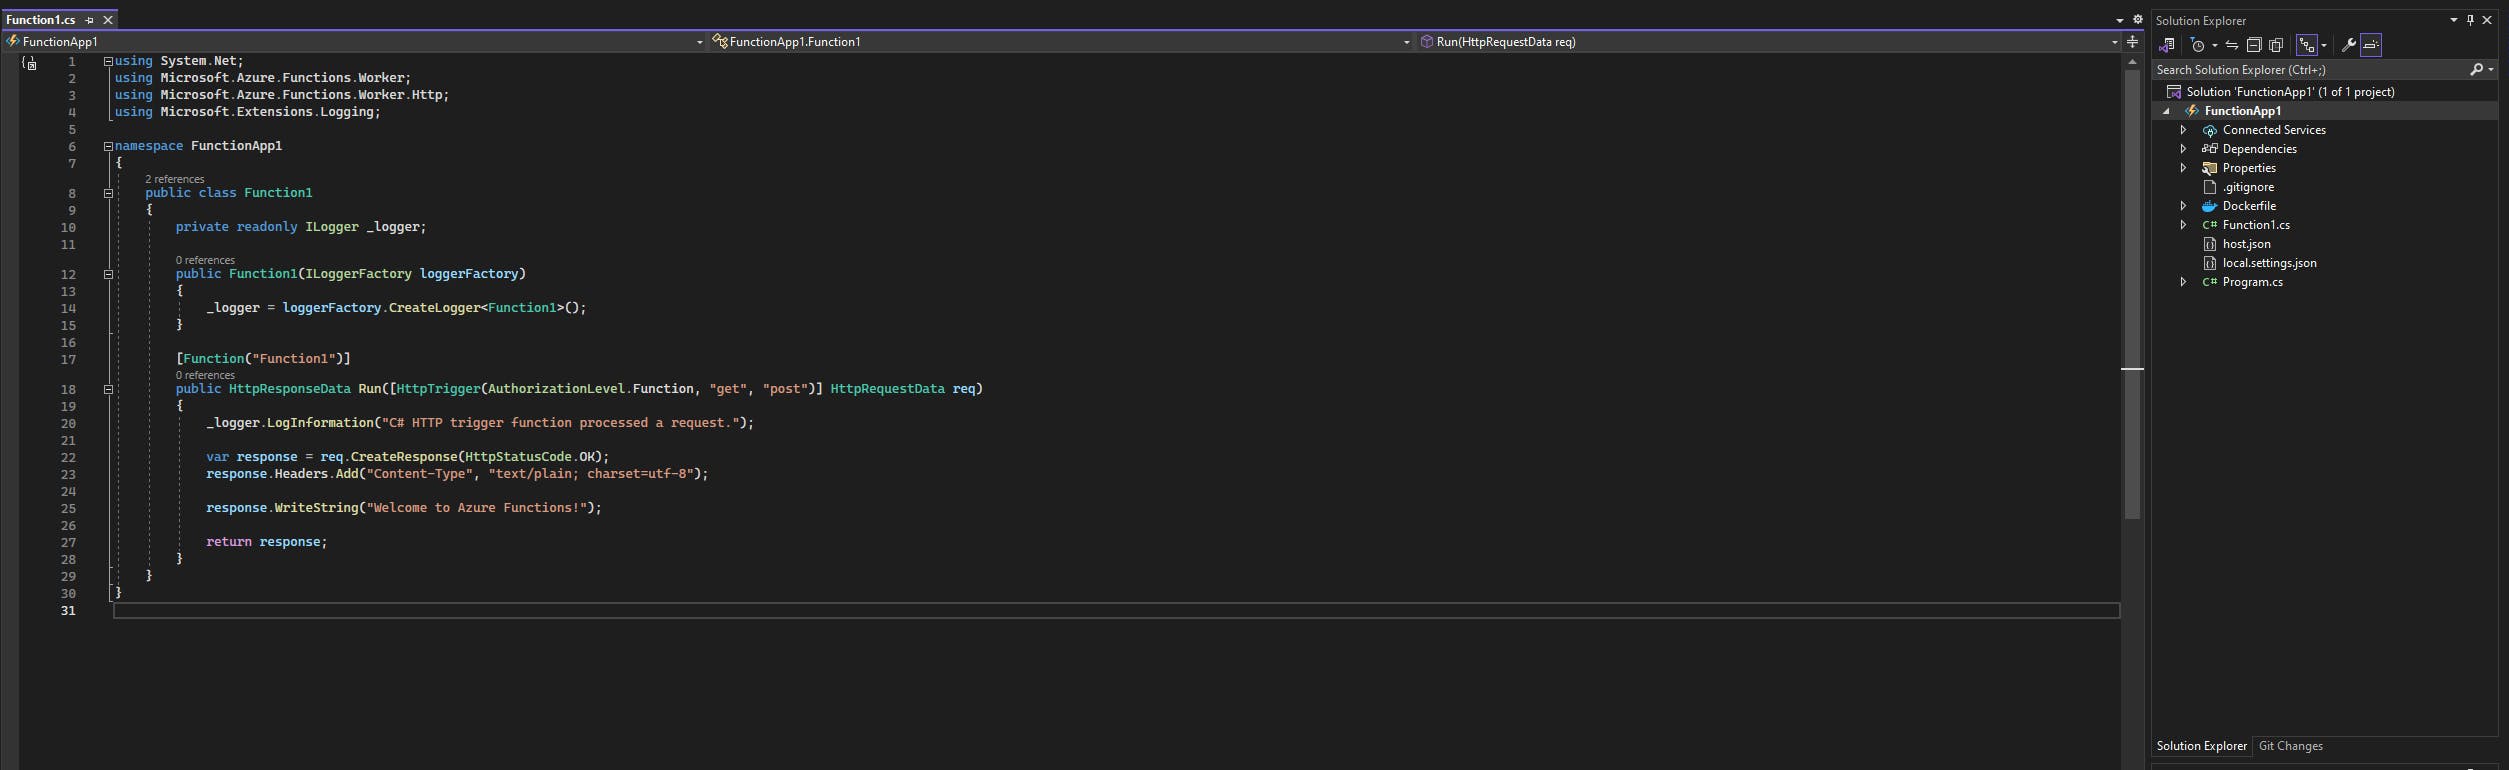
Visual Studio will then configure the solution, install dependencies and create a Dockerfile for us. Once this is finished, you will presented with the following view. Visual Studio may prompt you to open up Docker Desktop so it can initialise a Docker container for us to deploy to.
At this point you can click the "Run" button for Docker which will build and deploy the function to the Docker container. Sometimes this decides to fail which is no worry. An example of what this will look like in Docker is below if it didn't. We don't like Dockerfile's on their own as it restricts us from building something useful. Instead we will convert the Dockerfile for the project into a docker-compose file which will build out our function and any supporting resources into a container stack in Docker.
Convert the Dockerfile to a docker-compose file
Luckily for me there is a good documentation from Microsoft about how to add Docker Compose support but I will explain it anyway so you, the reader, don't need to do context switching.
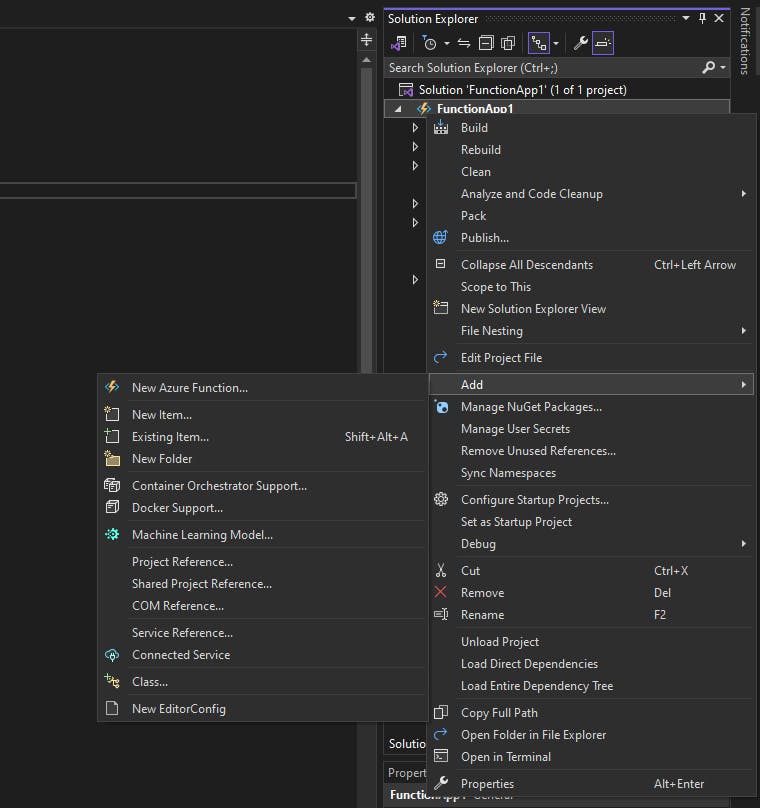
- Go to the project and right click it.
- Go to Add > Container Orchestrator Support
- Choose Docker Compose
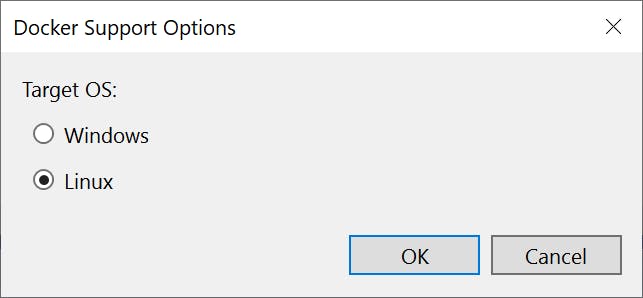
- Choose the Target OS (select Linux if you're following this example)
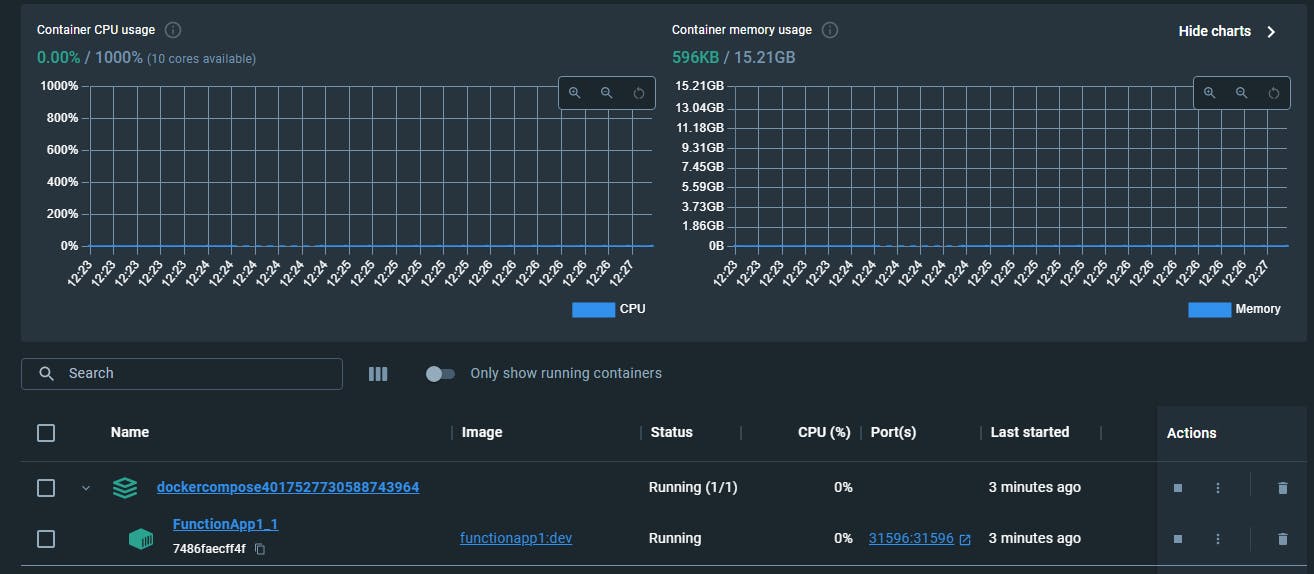
If everything went well, we will now have a docker-compose project in our solution and hopefully Visual Studio automated the docker stacked container creation. If you ran the Dockerfile before, you will need to select the running single container and delete it as Visual Studio will use the same ports to communicate to our app in the stacked container. It should look like this when the stacked container is running.
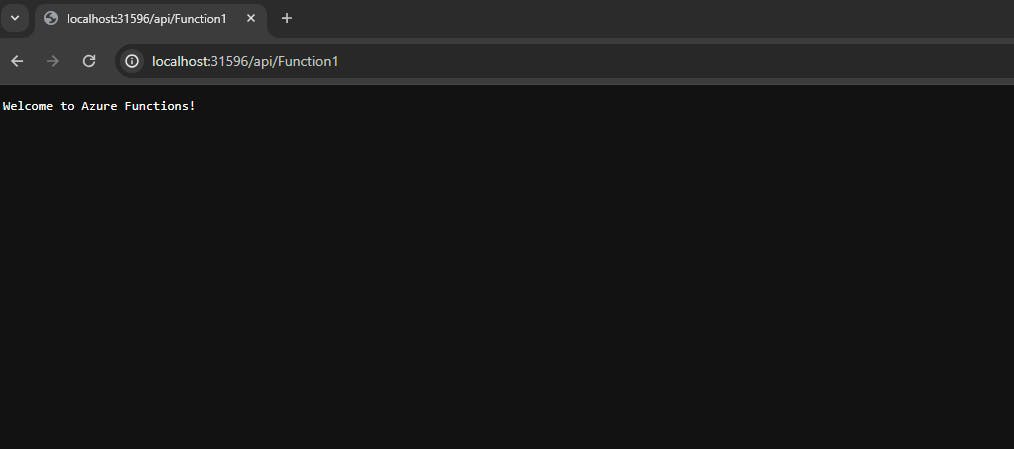
We can now run Visual Studio with docker-compose and access our solution from the stacked docker container. To do this, find the Functions section that are streamed into the logs. This will give you the URL where the function is available. Navigate to the URL to check you can access the container locally and that the function is returning.

Excellent! We are now running Azure Isolated Functions in Docker with the flexibility of stacked containers.
But why bother with stacked containers anyway?
Our example application is only hosting an Azure Function application, but that's not going to come in that handy if we want this to do other processing or fetch data from somewhere. We can simply add additional images for extra functionality without having to set up any physical applications on our local environment. This means our application becomes extremely portable so you are no long tied with your physical machine.
This is a small tangent but good for context of why we're doing this. If you want to stay on track, skip to the Swagger, here we come! section below. We will adjust our docker-compose.yml file to include a SQL instance on Linux which we could connect to our function. We will remove this later. Our current docker-compose.yml file looks like this.
version: '3.4'

services:
  functionapp1:
    image: ${DOCKER_REGISTRY-}functionapp1
    build:
      context: .
      dockerfile: FunctionApp1/Dockerfile
Adjust the docker-compose file to be as below. Here we've added a new service called `sql-server-db` with some metadata about what it should be called. We've selected the latest version of SQL server to run with the image. We've exposed ports 1433 for SQL to communicate to our machine as well as within the internal network of docker. And a couple of environment variables to accept the EULA and the SA_PASSWORD. The SA_PASSWORD must be changed to suit SQL Server's password requirements for the SA user.
We've also added a dependency on the SQL server to be running before the function app as we need a database connection to run the application.
version: '3.4'

services:
  functionapp1:
    image: ${DOCKER_REGISTRY-}functionapp1
    build:
      context: .
      dockerfile: FunctionApp1/Dockerfile
    depends_on:
      - sql-server-db
  sql-server-db:
    container_name: sql-server-db
    image: mcr.microsoft.com/mssql/server:2022-latest
    ports:
      - "1433:1433"
    environment:
      SA_PASSWORD: "{ChangeMe}"
      ACCEPT_EULA: "Y"
Now we can run the Docker Compose file and witness the magic happen.

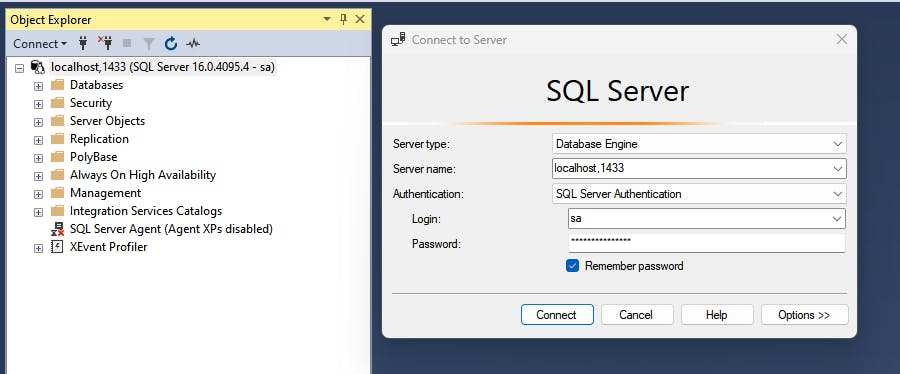
For a final test, we can open up SSMS and attempt to connect to the instance on localhost:1433 with the sa user and the password you used in the SA_PASSWORD field. We would then be able to seed our application with whatever data we want for development.
With passwords in Git being a bit no no we would need to use a docker-compose.override.yml file as it should not be committed to Git. But as we're going to delete this, there is no harm leaving it.
Stop the debugging session and copy back the original docker-compose.yml file, you can reference the first docker-compose.yml file above if needs be.
Swagger, here we come!
In the past, Swagger (OpenAPI) was a pain to get running in Azure Functions as you had to use quite a few external packages and inject Swashbuckle into the application startup. There's a nice article on how this was done in the past, but it's no longer relevant.
In in-process functions we would need to install the Microsoft.Azure.WebJobs.Extensions.OpenApi NuGet package.
However, for isolated functions we need to install the Microsoft.Azure.Functions.Worker.Extensions.OpenApi NuGet package.
Once that's installed, we need to go to the Program.cs file. It currently looks like this.
using Microsoft.Azure.Functions.Worker;
using Microsoft.Extensions.DependencyInjection;
using Microsoft.Extensions.Hosting;

var host = new HostBuilder()
    .ConfigureFunctionsWorkerDefaults()
    .ConfigureServices(services =>
    {
        services.AddApplicationInsightsTelemetryWorkerService();
        services.ConfigureFunctionsApplicationInsights();
    })
    .Build();

host.Run();
We need to replace the `.ConfigureFunctionsWorkerDefaults()` to include a worker configuration which is an extension method in the OpenApi package which we just installed.
.ConfigureFunctionsWorkerDefaults(worker => worker.UseNewtonsoftJson())Our full file will now look like this. Don't forget to add the new using!
using Microsoft.Azure.Functions.Worker;
using Microsoft.Azure.Functions.Worker.Extensions.OpenApi.Extensions;
using Microsoft.Extensions.DependencyInjection;
using Microsoft.Extensions.Hosting;

var host = new HostBuilder()
    .ConfigureFunctionsWorkerDefaults(worker => worker.UseNewtonsoftJson())
    .ConfigureServices(services =>
    {
        services.AddApplicationInsightsTelemetryWorkerService();
        services.ConfigureFunctionsApplicationInsights();
    })
    .Build();

host.Run();
Now we can run our application and observe our amazing OpenAPI documented functions. When running the solution again we can observe the additional URLs now present in the log stream.
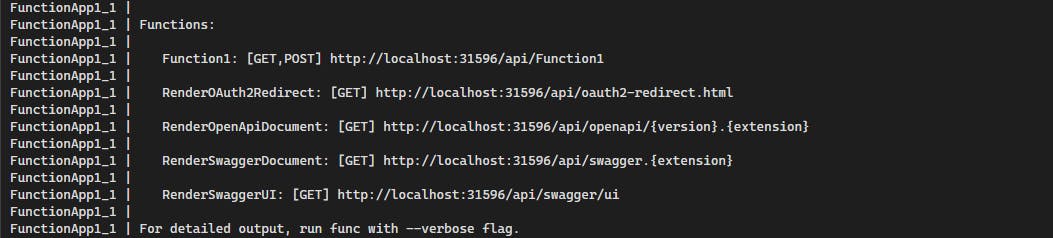
Let's navigate to the /api/swagger/ui route and observe our amazing GET meth....
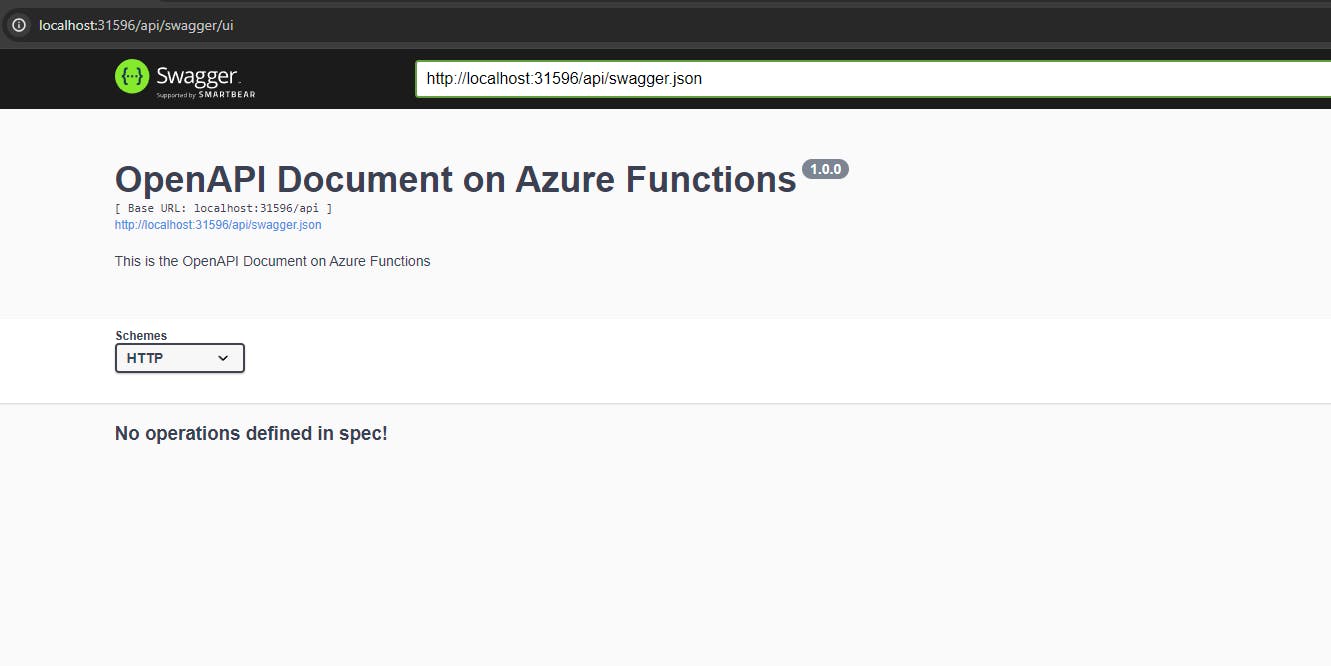
This is where things start to change from previous implementations. You now need to explicitly register an endpoint to be used in the OpenAPI specification. We need to use different attributes on our function to make it appear in the OpenAPI spec and to give it some useful detail.
Our Function1.cs file current looks as follows:
using System.Net;
using Microsoft.Azure.Functions.Worker;
using Microsoft.Azure.Functions.Worker.Http;
using Microsoft.Extensions.Logging;

namespace FunctionApp1
{
    public class Function1
    {
        private readonly ILogger _logger;

        public Function1(ILoggerFactory loggerFactory)
        {
            _logger = loggerFactory.CreateLogger<Function1>();
        }

        [Function("Function1")]
        public HttpResponseData Run([HttpTrigger(AuthorizationLevel.Function, "get", "post")] HttpRequestData req)
        {
            _logger.LogInformation("C# HTTP trigger function processed a request.");

            var response = req.CreateResponse(HttpStatusCode.OK);
            response.Headers.Add("Content-Type", "text/plain; charset=utf-8");

            response.WriteString("Welcome to Azure Functions!");

            return response;
        }
    }
}
We will add the `OpenApiOperation` attribute to Function1 to register it into the OpenAPI spec and have some additional detail. Don't forget to add the `Microsoft.Azure.WebJobs.Extensions.OpenApi.Core.Attributes` using. Our file now looks like this.
using System.Net;
using Microsoft.Azure.Functions.Worker;
using Microsoft.Azure.Functions.Worker.Http;
using Microsoft.Azure.WebJobs.Extensions.OpenApi.Core.Attributes;
using Microsoft.Extensions.Logging;

namespace FunctionApp1
{
    public class Function1
    {
        private readonly ILogger _logger;

        public Function1(ILoggerFactory loggerFactory)
        {
            _logger = loggerFactory.CreateLogger<Function1>();
        }

        [Function("Function1")]
        [OpenApiOperation("Function1-Spec", "Function1", Description = "Says welcome to Azure Functions")]
        public HttpResponseData Run([HttpTrigger(AuthorizationLevel.Function, "get", "post")] HttpRequestData req)
        {
            _logger.LogInformation("C# HTTP trigger function processed a request.");

            var response = req.CreateResponse(HttpStatusCode.OK);
            response.Headers.Add("Content-Type", "text/plain; charset=utf-8");

            response.WriteString("Welcome to Azure Functions!");

            return response;
        }
    }
}
Now we can run the application and navigate back to the Swagger UI page.
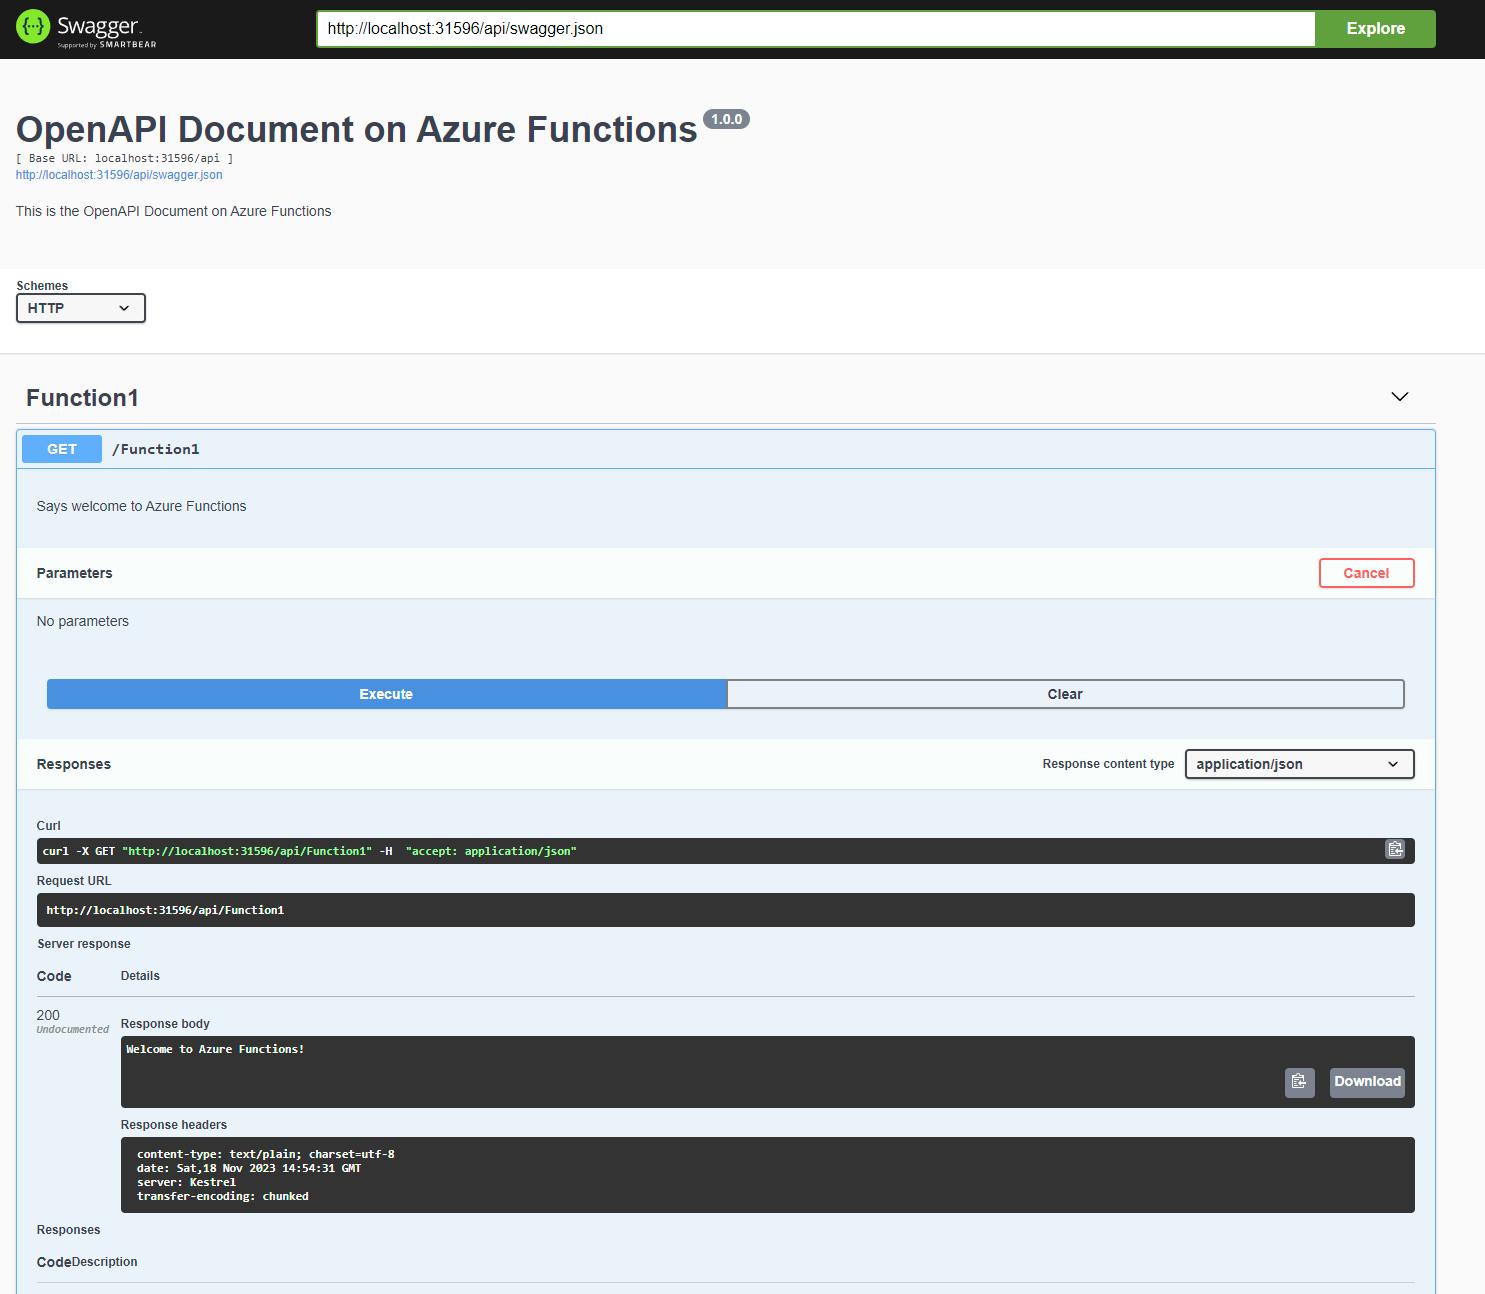
Success! Everything we want is here now. We can try out our registered HTTP functions in Swagger and build up a good Open API spec for other clients to use. More details about how to use this extension can be found in these GitHub docs.
We now have an Azure Function project that can support any NuGet package without being tied into Microsoft's own library dependencies with the ability to run an entire application real-estate without needing to install anything locally. Sounds like nirvana to me!
If I were you, I would consider saving this as a solution template to duplicate for different greenfield projects to save the setup every time.